I was looking for a timer cube to try focusing more when I'm working on something and also for taking breaks from time to time. In summary: to organize my time better. This tool consists of a small cube that has numbers on its four vertical faces. When you turn the cube a countdown timer starts from whatever number of minutes indicates the face that is pointing up.
This one on Amazon offers interesting time slots options for me: 5/15/30/60 minutes. It would offer me the flexibility to use it both for 100% focused work periods (usually 60 minutes) and to take 5 or 15 minutes breaks afterward. A similar working technique as the Pomodoro one.
The cube was available in different colors and I really liked the black one, so I chose it and finished my order.
In a couple of days, I received it at home, but when I took it out of the box I was disappointed: the time slots were not what I was expecting 😕
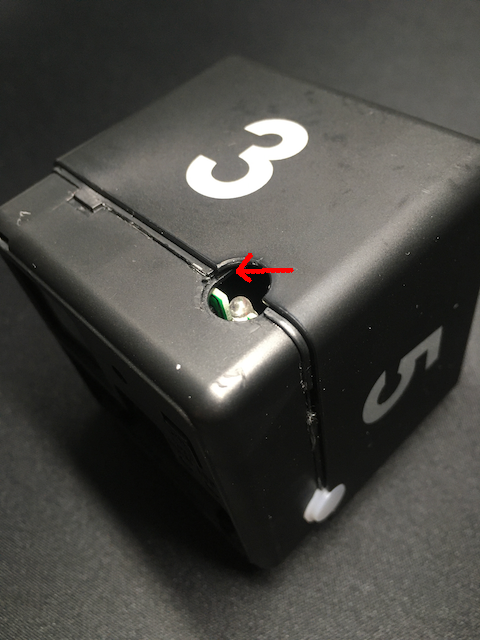
This one came with 3/5/7/10 minutes which, for my use case, is not practical.
I went right away to check on Amazon and I saw that, depending on the color, they have different time slots 🤦🏽♂️. I guess one has to check the descriptions better when buying something.
Any normal person would have put it back inside the box and returned it to Amazon, but not me...
First, Amazon does not have warehouses here so returning something is a bit more complicated (you have to pay to ship it or take it to one of those pick-up points). And second, after seeing they offer many different cubes with different time slots, I thought that internally they would be the same with the only difference of having some kind of "switch" on the electronics to specify what time slots to use.
Curiosity got the better of me, so let's get to work. I had to open this little cube to see what was inside.
I think taking this apart has been the most complicated thing. It is very compact and it doesn't have any screws. It took me a little while to see where to start without causing too much damage to the plastics.
Finally, I saw on the back some grooves that made me think that there was a plastic part covering a section.
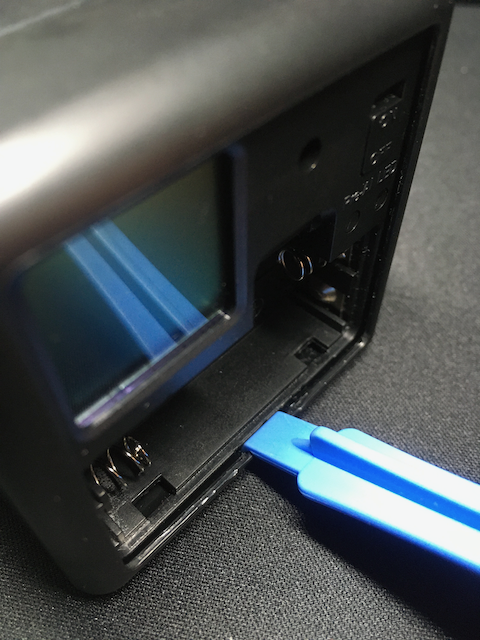
With plastic spudger pry tools and a big lot of patience, I managed to get it out, although it did not seem like I had achieved much. I couldn't see where to go from there. But then I was able to remove the translucent plastics that cover the LEDs and see a little more where to go.
Inserting the blade of an x-acto knife from the side, I was able to take off the main piece of the cube that covers all the electronics.
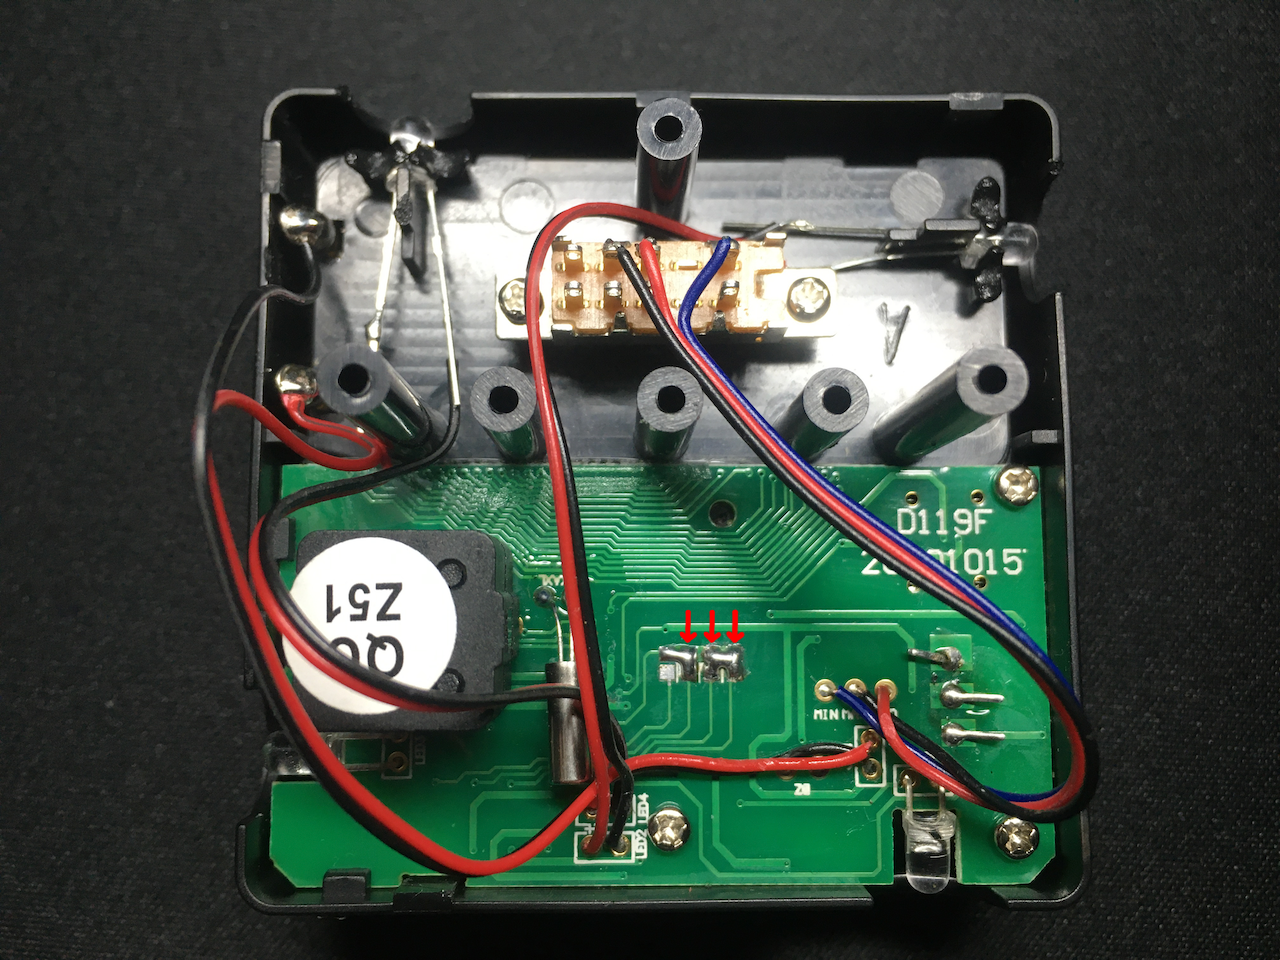
Analyzing the PCB, which is quite simple, I can see that there are a couple of rows with four small contact pads each and that the last column was connected 🤔🤔This is what I was looking for since what I was referring to earlier is that there was some type of "selector" to change the configuration.
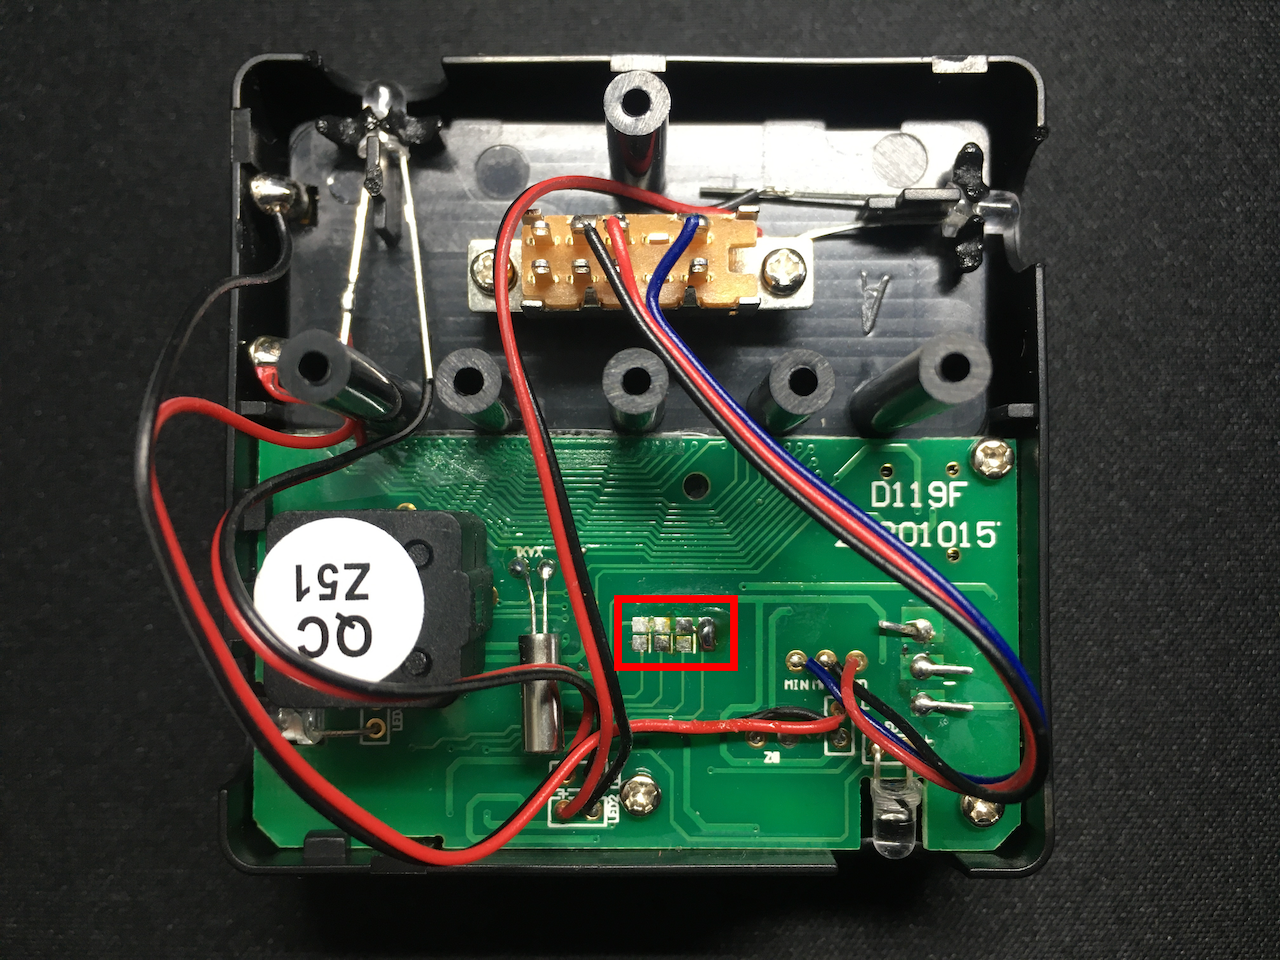
To check if it really works as I think, I "disconnect" the last column by unsoldering it and put the batteries back in, and ... BINGO !! I was right. Now the time slots that are 10/20/30/60 minutes 👏🏽
Out of curiosity (which is what has brought me to this point), the interesting thing would be to go soldering / desoldering different combinations of columns to see how many options there are. I think it should work as a binary table. There are 4 bits that can be ON / OFF, so there would be 16 different combinations, but I think they are too many ...
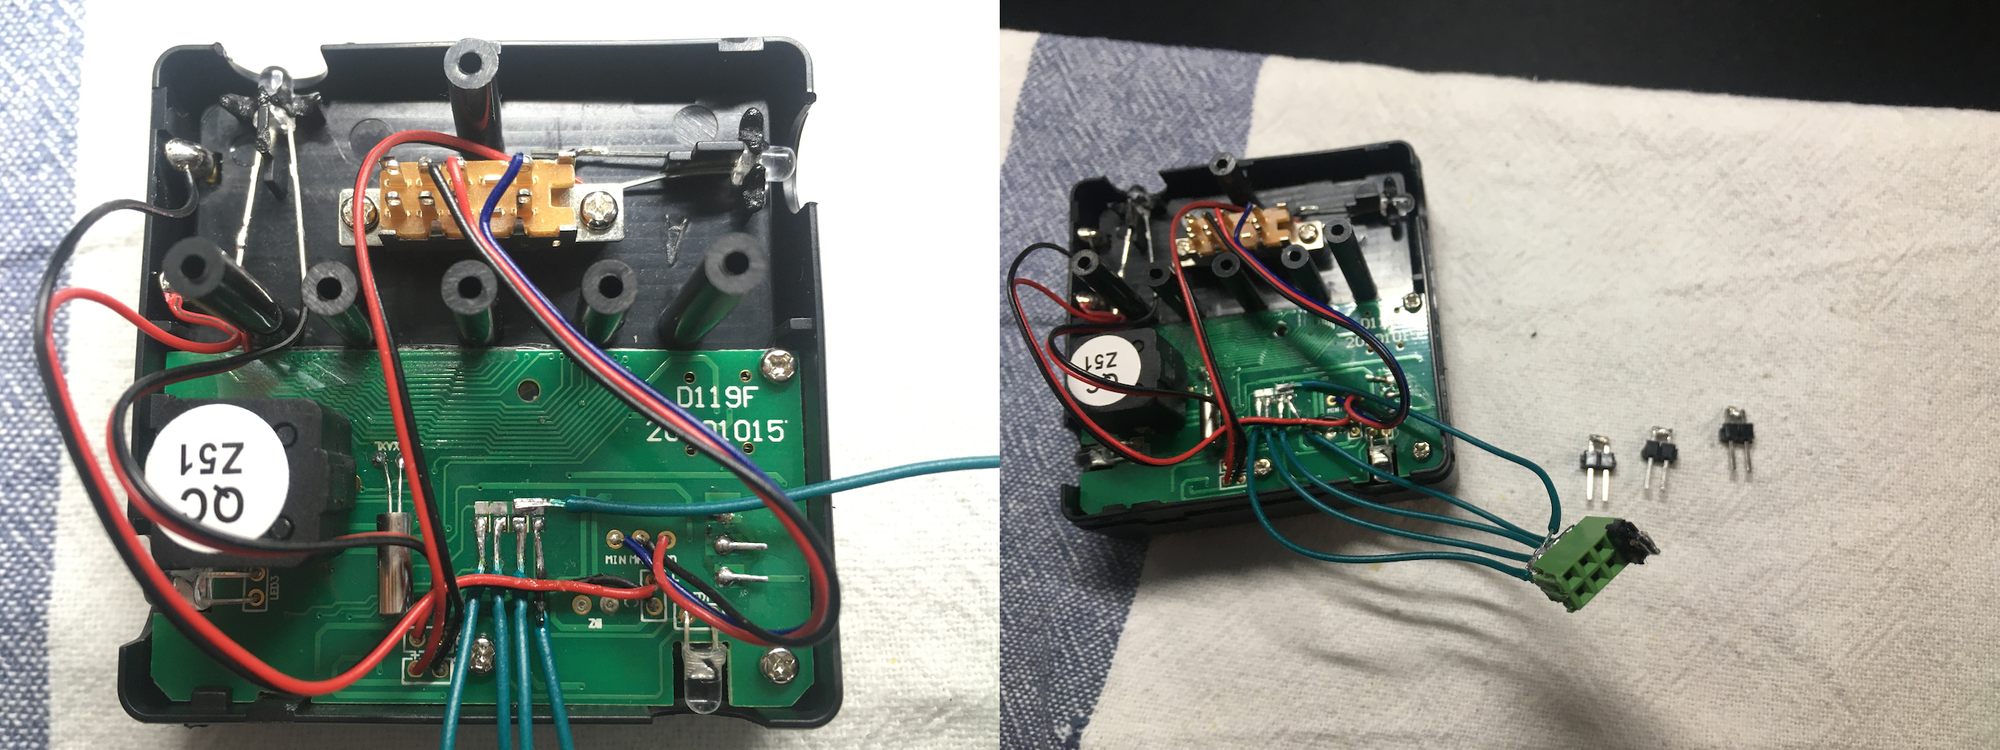
To make the task easier, I solder a pair of sockets with four inputs each. I connect the first one to any pin of the first row (this row is connected entirely to the same line). In the second, each pad goes to a pin. Now, with some small jumpers, I can connect and disconnect each column.
I make a small table and I try the 16 possible combinations and, to my surprise, there are many different ones, 15 in total since the first and last are the same.

| Configuration | Time slots |
|---|---|
| ❎ ❎ ❎ ❎ | 10/20/30/60 |
| ❎ ❎ ❎ ✅ | 3/5/7/10 |
| ❎ ❎ ✅ ❎ | 15/20/25/30 |
| ❎ ❎ ✅ ✅ | 5/10/20/30 |
| ❎ ✅ ❎ ❎ | 3/5/10/15 |
| ❎ ✅ ❎ ✅ | 5/10/15/60 |
| ❎ ✅ ✅ ❎ | 10/30/50/60 |
| ❎ ✅ ✅ ✅ | 15/30/45/60 |
| ✅ ❎ ❎ ❎ | 1/5/10/15 |
| ✅ ❎ ❎ ✅ | 5/15/30/60 |
| ✅ ❎ ✅ ❎ | 1/5/10/30 |
| ✅ ❎ ✅ ✅ | 15/20/45/60 |
| ✅ ✅ ❎ ❎ | 5/10/45/60 |
| ✅ ✅ ❎ ✅ | 5/10/15/20 |
| ✅ ✅ ✅ ❎ | 30/45/60/90 |
| ✅ ✅ ✅ ✅ | 10/20/30/60 |
Knowing that there are even different combinations to those offered when they sell the cube, I think the one that may interest me the most is the 15/30/45/60 (I would have liked to have a 15/30/60/90). So I connect the last three columns.
The solder joins some of the pads of the first row but it does not matter because, as I said before, this row is connected entirely to the same line.
I reassemble the cube. The problem now is that the numbers on the four faces are not the same as the ones I just set.
Since I have a 3D printer, it occurs to me to do a quick design with the new numbers. Some kind of patch that I can stick on top.
I print it with a technique to have more than one color in the same piece, so you can see the numbers much better.
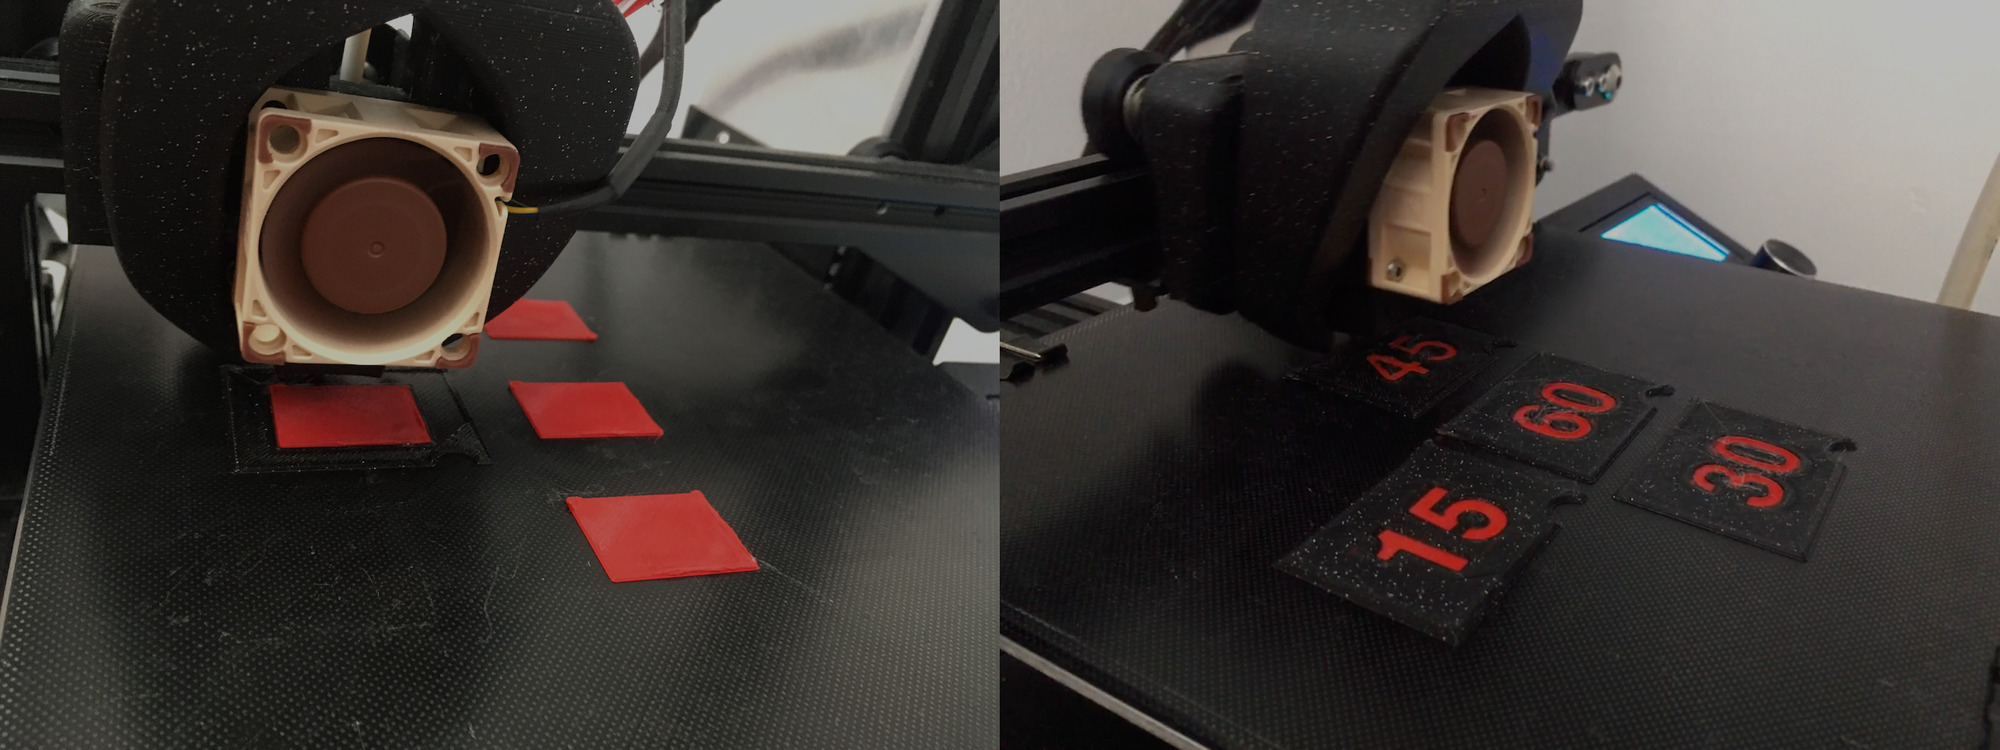
The only thing left is to glue them on the corresponding faces and enjoy my "new" timer cube 😁
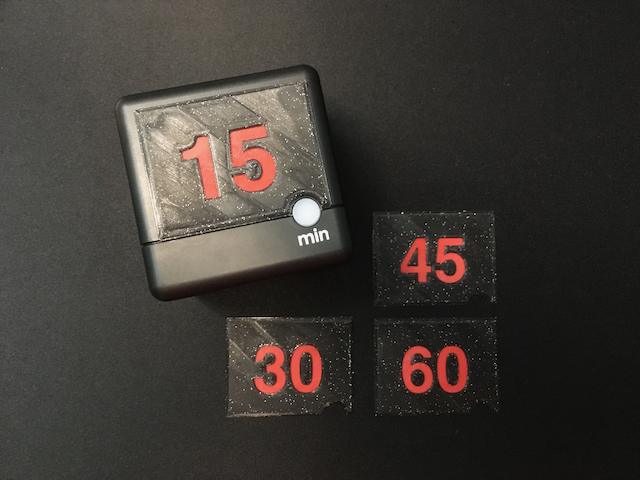
Final result: